In this tutorial, you will learn how to move the sprite we have, based on input. Handling input is actually not that hard, thanks to the classes that Microsoft lets us use. In order to complete this tutorial, there are a few steps we need to do.
Step 1 : Create a variable that can keep track of the keyboard input.
Step 2 : Check for input constantly.
Step 3 : Act upon input.
Now let's do these steps.
Step 1 : Create a variable that can keep track of the keyboard input
In order to check for input, we need to create a variable that can keep track of input. Microsoft has created a class that helps with this type of thing. This class is called a KeyboardState. Create a variable for this in the fields area:
KeyboardState myKeyboard;
This creates a KeyboardState variable. Notice we don’t initialize it. That is because we will re-set the value of it every update, so we don’t need to spend time initializing it now.
Note: We didn’t put the private keyword in front of our variable declaration. This is because we don’t need to. If we don’t put private in front of the variable declaration, then the variable will become private by default.
Step 2 : Check for input constantly
This is the step where we will actually check for input. Since we must always be checking for input(because the user can push a key at any time), we need to put our input checks in the Update method. Again we will use if statements to check for input. Place this code inside the Update method after the code you had placed there in the previous tutorials:
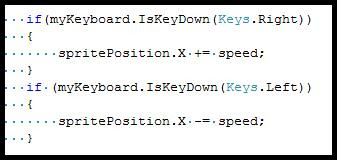
if(myKeyboard.IsKeyDown(Keys.Right))
{
}
if(myKeyboard.IsKeyDown(Keys.Left))
{
}
This code actually checks for input. We have put two different checks to check if the left or right arrow keys have been pressed. You can probably see what is going on in these if statements.
First off, we access the IsKeyDown method of our keyboard variable myKeyboard. This method checks if a key was is currently held down. We want to see if the right or left arrows of the keyboard is down so we pass in as parameters, Keys.Right or Keys.Left. Keys is a class Microsoft has let us use that stores all the keys on the keyboard.
Now that we have the input checks done, there is one thing we have to do before we can actually put something inside these if statements. We need to actually get the current state of the keyboard. To do this, put this code at the top of the Update method, underneath the code to exit the game:
myKeyboard = Keyboard.GetState();
As I was saying earlier, we didn’t initialize myKeyboard because we would reset it’s value every update. In this line of code, we are setting myKeyboard to a value of the current state of the keyboard. We get the current state of the keyboard by using the command Keyboard.GetState() which calls the GetState method of the Keyboard class. The GetState method takes no parameters.
 Figure 1-1 Initializing Our Keyboard Variable Every Update
Step 3 : Act upon input
This is the final step, and the step where we actually get to do move our sprite based upon the keyboard input. We want our sprite to move only when we push the arrow keys. Instead of constantly updating the sprite’s position like we have been doing, we will now only move the sprite if an arrow key is pressed. Delete the code that increases the sprite’s position by speed and place this code inside the if statements that check for input.
//This code inside the right arrow input check
spritePosition.X += speed;
//This code inside the left arrow input check
spritePosition.X -= speed;
This code will move the sprite only when the left or right arrows of the keyboard have been pushed. We increase the sprite’s X-position by speed when the right arrow is down, and decrease the sprite’s X-position by speed when the left arrow is down.
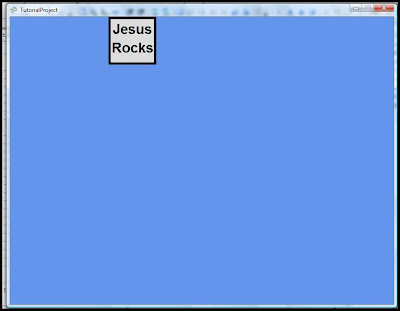
 Figure 1-2 Moving Our Sprite Based on Keyboard Input
Now since we won’t need the sprite to reverse direction when it collides with the side of the screen, you can replace the old collision code with this new code:
if(spriteCollisionRectangle.Right > screenRectangle.Right)
{
spritePosition.X = screenRectangle.Right - myTexture.Width;
}
if(spriteCollisionRectangle.Left st screenRectangle.Left)
{
spritePosition.X = screenRectangle.Left;
}
All this code does is, if the sprite’s left or right side has started to go beyond the screen. Then the sprite’s left or right side will be set to the left or right side of the screen. This way the sprite cannot go beyond the edges of the screen.
You may think it would be easier to type spriteCollisionRectangle.Right = screenRectangle.Right or spriteCollisionRectangle.Left = screenRectangle.Left. This would be easier but there are two problems that occur with this.
First of all, if you wrote that, the compiler would throw an error because for some reason you cannot change the values of the rectangle, you can only use them. In other words, the rectangle values are readonly(a C# keyword).
Second of all, even if you could change the values of the rectangle, why would you want to. If all we did was move the collision rectangle, the position of the sprite would stay the same. In other words, if we just moved the sprite's collision rectangle, the sprite would not stop moving because his position is not being changed, only his collision rectangle.
In order to make it where the position of the sprite is changed, we have to access either the sprite's X or Y-positions. Since we are moving horizontaly we accesss the sprite's X-position.
Then we need to stop the sprite's X-position movement when we are colliding with the screen edge.
 Figure 1-3 The New Collision Code
We put spritePosition.X = screenRectangle.Right - myTexture.Width. All this code is doing is setting the X-position of the sprite to the right side of the screen. We need to minus the width of the texture because the X-position of the sprite refers to the left side of the sprite and since we want to make it seem like there is a collision with the right side of the sprite and the right side of the screen, we need to actually make a collision with the left side of the sprite(the sprite's X-position), and the right side of the screen minus the width of the texture.
When we do the command spritePosition.X = screenRectangle.Left we don't have to make any changes because we are setting the left side of the sprite to the left side of the screen.
Now test your project. You should be able to move the sprite based on keyboard input. Also, the sprite should stop when it collides with the sides of the screen.
 Figure 1-4 The final result
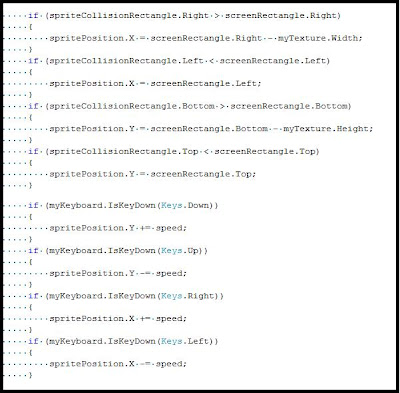
Just to add a little more functionality into our project, add this code into the Update method to allow up and down movement:
//Under the left and right arrow input checks
if(myKeyboard.IsKeyDown(Keys.Down))
{
spritePosition.Y += speed;
}
if(myKeyboard.IsKeyDown(Keys.Up))
{
spritePosition.Y -= speed;
}
//Under the left and right side collision checks
if(spriteCollisionRectangle.Bottom > screenRectangle.Bottom)
{
spritePosition.Y = screenRectangle.Bottom - myTexture.Height;
}
if(spriteCollisionRectangle.Top st screenRectangle.Top)
{
spritePosition.Y = screenRectangle.Top;
}
Finally, move all the collision code underneath the input code. I don't know why but I like to have input code before collision code.
 Figure 1-5 The New Update Method With Added Code
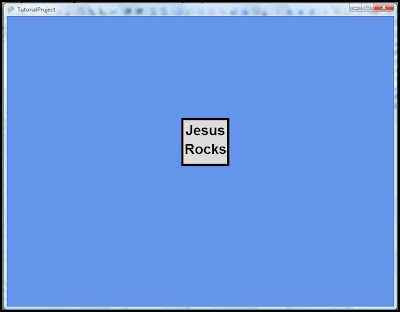
Now you can move your sprite up and down also. You should be able to understand what this code does.
 Figure 1-6 The Final, Final Result
If you have any requests or if parts of this tutorial were confusing, please post a comment.
Thanks for reading this tutorial.
Seriously, what do you think will happen to you when you die?
2 comments:
Thank you for writing such wonderful tutorials, i learned a lot about XNA in your tutorials. According to tutorial 5, is this code necessary spritePosition.X += speed;, i have removed it so that the sprite will not move with constant speed. With that code, the sprite will moves automatically without any input. It is possible to make a tutorial based on character moving, i need this desperately. Thanks in advance and have a nice day
What do you mean? I have Tutorial 3which talks about moving character without input. I fon't know exactly what you mean buy "character moving".
Post a Comment