Now that you have a pretty sweet sprite drawn on the screen. It is time to actually make the sprite do something. Here are the steps we need to do to make the sprite move:
Step 1 : Give our sprite a position variable so that we can change the sprite’s position.
Step 2 : Draw the sprite at the position variable instead of at a variable we create when we call mySpriteBatch to draw.
Step 3 : Every time the computer loops through the code, move the sprite by a certain amount.
These steps we will accomplish and hopefully, without much confusion.
Step 1 -- Give our sprite a position variable so that we can change the sprite’s position
As the name of this step shows, we need to create a variable for our sprite. You may be wondering why we need to do this because we already created a variable for the position of the sprite in the call to draw:

Figure 1-1 The Call to Draw the Sprite at a Position
Well, yea, we created this variable but there is a problem:This variable does not have a name that we can access it by. When we call mySpriteBatch to draw, we are creating a new Vector2 class to draw the sprite at. This is useful if you are never going to need to access this variable, but throws a problem when we want to change the value of this variable. In order to fix this problem, we need to create a Vector2 variable that can be accessed from everywhere inside the class. Then we can always change this position whenever we want to.
To create this variable, type this code in the fields area(the place where all our other variable declarations are):
private Vector2 spritePosition;
This code creates our Vector2 variable that can hold the position of our sprite. Now we need to initialize it.
Instead of going to the Initialize method, we can just initialize the variable at the same time that we create it. To do this, replace the code you just typed, with the following:
private Vector2 spritePosition = new Vector2(0, 0);
If that was confusing just think of it as I need graphics to be set to a value before I can use it, and since graphics is not set to a value until the constructor is called, I need to create mySpriteBatch after the constructor is called, which is in the Initialize method.
Step 2 -- Draw the sprite at the position variable instead of at a variable we create when we call mySpriteBatch to draw
Now that we have an initialized Vector2 variable to work with, lets test out the variable by changing the call to draw. Replace the old mySpriteBatch.Draw call with this:
mySpriteBatch.Draw(myTexture, spritePosition, Color.White);
This code replaces the, new Vector2(0, 0), call we had there earlier, with our Vector2 variable spritePosition. This does not throw an error because all the Draw method is asking for is a Vector2, so whether we pass in a new Vector2 we create at the moment, or a variable, it doesn’t matter because all that the method needs is a Vector2.
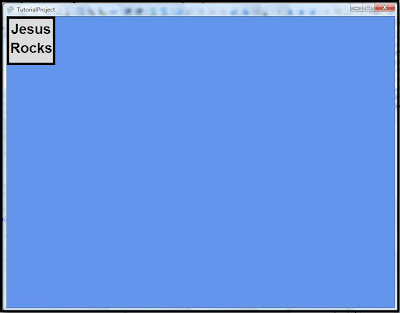
If you run the project right now, you should see the same sprite placed at the exact same position it was at the end of the last tutorial. This is because we didn’t change the value of spritePosition. We kept the spritePosition at the value of 0, 0, which was the same value of the new Vector2 we had created when we called to draw. Build the project anyway, just to make sure everything is working correctly.

Figure 1-2 Your Output Should Look Like This
Step 3 : Every time the computer loops through the code, move the sprite by a certain amount
Now comes the fun part. Actually moving the sprite.
Since we put the position of a sprite in a variable. All we need to do to move the sprite is change it’s position by a certain amount every time the compiler loops through the code. To make this happen, we need to go to the Update method. The Update method is called every time the compiler loops and is where you want to place all your game code. By this I mean all code that updates positions, collision handling, input checking, etc… You do not want to put draw code in this method though. You should put drawing code inside of the Draw method.
Once you have located the Update method, place this code inside of it. I put my code in between the input check for exiting the game, and the base.Draw(gameTime), call.
spritePosition.X += speed;
This code moves our sprite by a certain amount every time the compiler loops through the code.
First we create a variable to keep the speed the sprite should move at. We store this variable as a float, which is like a decimal, but it only keeps the first 7 decimal points. We set the value of the speed to 0.5f. We put an f or an F after the number to show that this number is a float. If you don’t put it there, the compiler will think that you are trying to make an integer and since integers can't hold numbers after the decimal point, the compiler will throw an error.
After we declare speed, we need to change the sprite’s position. We want to move the sprite to the right so we have to do two things.
First we have to access the X-coordinate of spritePosition because we want to move the position of the sprite sideways.
Secondly, we have to add to the X-coordinate of the sprite. We add because we want to move the sprite to the right. The further right to the screen(in a 2D game) means the higher the number of the X-coordinate. The further left to the screen means the lower the number.
Now maybe you have just one more question. What does the += operator mean?
Putting the += operator is the same thing as putting: spritePosition.X = spritePositon.X + speed;
 Figure 1-3 The code in the Update Method
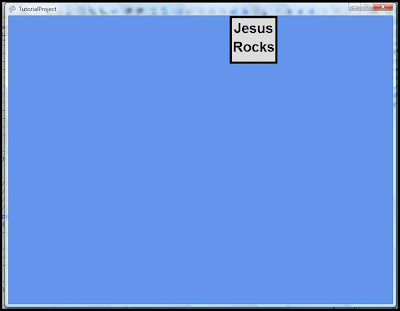
Now if you run the project. The sprite should move across the screen at a slow pace. If you are patient enough to watch though, we have one problem. The sprite doesn’t stop when it hit’s the end of the screen. Even though we could fix that problem now, I want to save that for the next tutorial. What we learned in this tutorial though, is how to move a sprite. Which, after all, only takes a few lines of code.
You can run the code now and enjoy your sprite moving across the scene…until it moves off the screen.

Figure 1-4 Our Finished Tutorial
P.S. Try seeing how you can move the sprite’s Y-coordinate. I’m sure you can figure it out. Just one tip : The further towards the bottom of the screen, the higher the number of the Y-coordinate. Once you have tested the code enough, make sure to erase all modifications you made so we can all be on the same page for the next tutorial.
If you have any questions or requests, post a comment for this tutorial.
Thanks
Remember: Don’t worry, the Lord has everything under control.
No comments:
Post a Comment